Dreamy Garden House Miniature Kit: DIY Greenhouse Dollhouse
Dreamy Garden House DIY Miniature Kit – Wooden Dollhouse Puzzle with Greenhouse
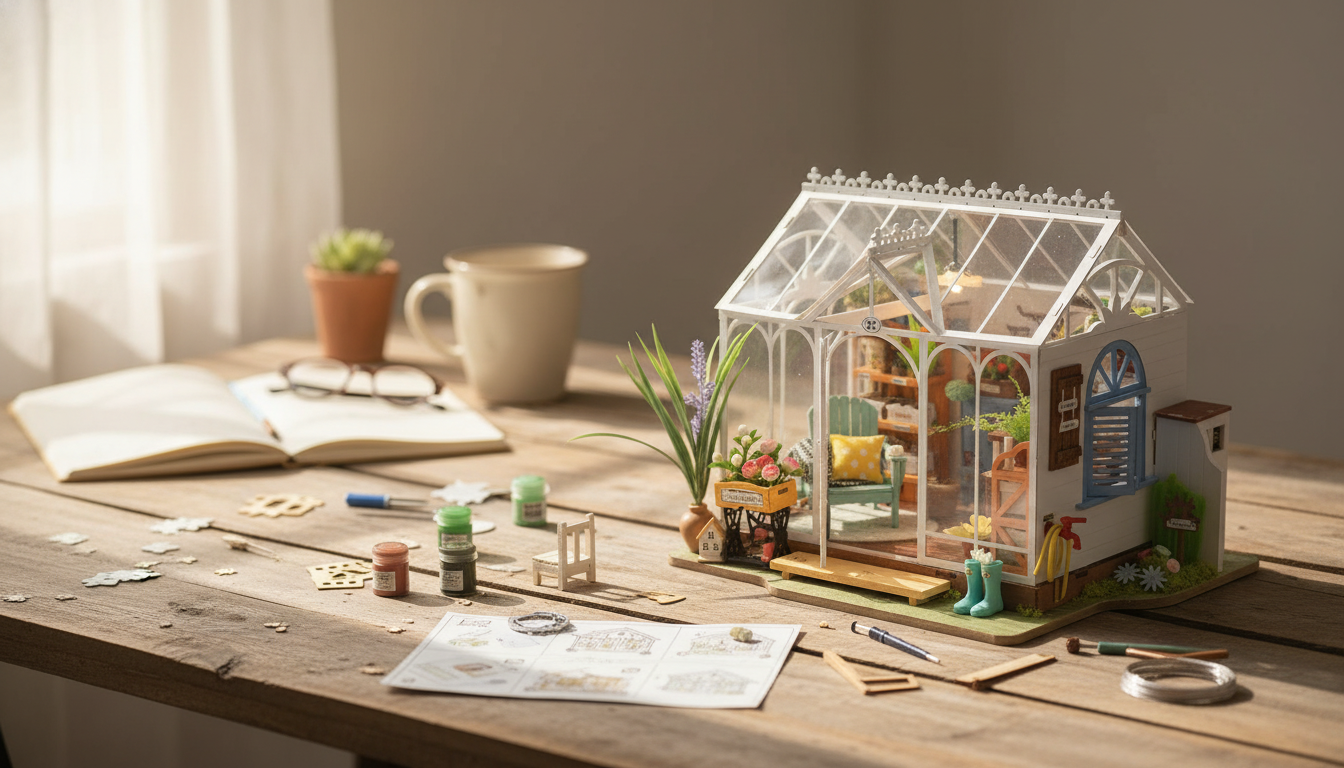
A cozy, plant-filled miniature that blends a wooden dollhouse-style build with greenhouse details, the Dreamy Garden House scene is made for slow, satisfying crafting. You’ll spend time sorting, dry-fitting, gluing, and decorating tiny elements until the finished space feels bright, warm, and surprisingly lifelike. Once complete, it’s the kind of piece that looks right at home on a bookshelf, office desk, or inside a display cabinet—like a tiny botanical retreat you built by hand.
What makes the Dreamy Garden House scene special
- Greenhouse-inspired look: clear “window” sections and plant-forward décor create an airy, sunroom vibe once assembled.
- Wooden construction with puzzle-like parts: the structure is designed to fit together into a sturdy base you can confidently detail.
- A weekend-friendly pace: it’s easy to build in stages—no dedicated workshop required.
- Display-friendly footprint: after the build, it becomes a decorative object, not just a one-time activity.
If you’re ready to start building, you can find the kit here: Dreamy Garden House DIY Miniature Kit – Wooden Dollhouse Puzzle with Greenhouse.
What’s typically inside the kit (and what to have ready)
Most miniature greenhouse-style kits include the core structure plus a variety of tiny props that bring the scene to life. Exact contents can vary by batch, but you can generally expect:
- Pre-cut wooden pieces for walls, floors, and structural elements
- Mini décor components (planters, shelves, small props, layered details)
- Clear/transparent elements to mimic greenhouse windows (varies by batch)
- An instruction booklet with numbered steps
To make the experience smoother (and more relaxing), a few simple tools help a lot—especially when you’re placing small parts cleanly and keeping edges neat.
Quick prep checklist for a smooth build
| Item | Why it helps | Tip |
|---|---|---|
| Craft glue (wood/paper compatible) | Cleaner joins and fewer gaps | Use a toothpick to apply micro-dots |
| Tweezers | Accurate placement of tiny pieces | Choose fine-tip, non-serrated tips |
| Hobby knife + cutting mat | Trimming tabs, paper, and small edges | Make light passes instead of forcing cuts |
| Sandpaper/file | Better fit and cleaner edges | Lightly sand only where parts bind |
| Clips/rubber bands | Holds pieces while glue sets | Protect surfaces with scrap card |
| Tray/organizer | Prevents lost parts | Sort by step number or part size |
Choosing the right difficulty level and time commitment
This is the kind of build that rewards patience more than speed. It’s best for detail-oriented makers who enjoy repetitive, precise steps (the same kind of satisfaction you get from model building or jigsaw puzzles—just with glue).
- Great for careful beginners: especially if you work in short sessions: sort first, dry-fit second, glue third.
- Time expectations: experienced crafters may finish over a few evenings, while newcomers often prefer a week of relaxed sessions.
- Mindful crafting: the steady rhythm of assembling, aligning, and refining can feel calming and focused.
Step-by-step build approach (without rushing)
Stage 1: Sort and label parts
Before any glue comes out, match pieces to the instruction diagrams. Separate similar sizes and group parts by step so you’re not hunting mid-build.
Stage 2: Dry-fit first
Test each joint before gluing. Dry-fitting reduces misalignment and helps you spot “tight” areas that need a touch of sanding.
Stage 3: Build the base and structure
Start with the floor, then walls, then major supports. A square, stable frame makes every later detail easier and cleaner.
Stage 4: Add greenhouse window elements
Handle clear parts carefully to reduce scratches and fingerprints. If a piece needs adhesive, apply glue to the frame rather than the window surface whenever possible.
Stage 5: Assemble furniture and micro-details
Stage 6: Final set and cleanup
Finishing touches that make it look realistic
For extra styling on a nearby shelf, a decorative vessel can echo the garden theme without competing with the miniature’s detail, like the Hand-Painted Jade Porcelain Cheongsam Vase – Retro Chinese Ceramic for Flower Arrangements.
Safety and care basics during assembly
- Ventilation: use glue (and any optional paint) in a well-ventilated area; the U.S. EPA has practical guidance on improving airflow indoors: Indoor Air Quality (Ventilation basics).
- Blade safety: cut away from fingers and keep blades sharp so you don’t have to force cuts. For general hobby safety reminders, the U.S. Consumer Product Safety Commission — Hobby and Craft Safety is a solid reference.
- Small-part caution: tiny components can be a choking hazard; this is best for teens and adults (or closely supervised older kids).
- Curing time: let glued sections set fully before attaching load-bearing parts to reduce warping and weak joints.
Who this kit is great for (and gifting ideas)
For inspiration on how real greenhouse spaces are organized (and why certain layouts feel so bright and functional), the Royal Horticultural Society — Greenhouse guidance and care is a helpful reference point—even when you’re building a miniature version.
Common build hiccups and simple fixes
FAQ
Does the kit include everything needed to build the miniature?
The kit typically includes the pre-cut wooden pieces, miniature décor components, and step-by-step instructions. For the cleanest results, it’s smart to have basic tools ready—especially tweezers, a hobby knife, and a compatible craft glue.
How long does it take to finish the Dreamy Garden House miniature?
Build time depends on experience and how detailed you get, ranging from a few evenings for practiced crafters to about a week of relaxed sessions for beginners. Working in stages (sorting, structure, then details) helps keep the process enjoyable.
Is it suitable for kids?
Because the build uses small parts and often involves sharp tools and adhesive, it’s generally better for teens and adults. Older children can participate with close supervision, especially during cutting and gluing.


Leave a comment